
How to Make a Crystal Grid: Step by Step
- Hannah
- Jul 4, 2022
- 3 min read
Crystal grids are a powerful tool for releasing your intentions to the universe and manifesting your dreams. They combine the power of sacred geometry, with the energies of crystals and Mother Earth, if you choose to use other items.
Grids can be created for a variety of reasons, and there is ALOT of information out there dictating to use a specific grid design with specific crystals and use an exact method. But that simply isn't true. What works for one person, may not be right for you.
The most important thing to know is to trust your intuition, do what you feel is right and you won't go wrong. So, with that in mind, here is an easy step-by-step to create any grid from scratch.
You will need:

Pen
Paper
Grid Base
Space
Crystals
Sage or Incense
Step One: Prepare
Before you start building your grid, first think of what you would like to achieve or what your intentions are. This could be anything, but hold this in your mind throughout the remaining steps.
Once you have decided on your intention(s), write down on a piece of paper and fold, ready to place under your grid. You can also hold your intentions in your mind when selecting your grid base (if you have various options, if not, there is no issue), and when you are selecting your crystals.
Selecting your Crystals
When selecting your crystals, you can use crystals that relate to your intentions, such as Rose Quartz for love. However, it is always better to pick your crystals intuitively. Trust your instincts and select what you are drawn to.
Step Two: Cleanse

Next, you should cleanse yourself, your space, and your crystals. You can do this by smudging using Sage or Incense.
By cleansing, you are removing any energies to make space for the new energy. Where your crystals are concerned, this helps you to remove any previous intentions or energies they have absorbed.
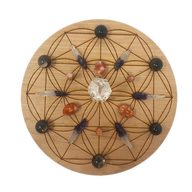
Step Three: Build
Now it's time to build your grid. Place your piece of paper with your intention on the table with your grid over the top. Remember to hold your intention in your mind as you build your grid.
Next, it is time to start placing your crystals. How you choose to do this is up to you, again it is best to work intuitively, placing the crystals where you feel they need to go.
If you are struggling with where to place them, why not try to place them following the points on the grid where the lines meet?
You could try working from the centre to the outside, placing your centre crystal, and working around this.
Or try working in sets of 2, 3, or 5, placing around the grid as you like.


Step Four: Activate

Finally, it is time to activate your grid. This step is often missed but is vital as it brings everything together.
To activate your grid, take a crystal of your choice (Clear Quartz is often used), and draw invisible lines between all of your crystals, consciously linking them with your intention. Follow the crystals as you feel you need to.
When you feel happy, place your activation crystal at the edge of your grid (often placed at the base), but you can choose any position outside your grid.
And that is it! Your grid is activated. You can go back to your grid daily and reactivate it, this can help to increase the power of your grid, but this is not vital.
Leave your grid up as long as you like, but we would recommend at least a few weeks. When you feel it is time, you can dismantle and build a new grid with new intentions, or the same.


Comments